10 Key Tips For Fashion Photography
1.Fashion photography should convey an essence of authority, so your direction of the model(s) needs to be confident and self-assured. Showing signs of anxiety, stress or lack of direction will invariably be reflected in the performance of your model so make the subject feel comfortable and involved. Organise a shot list before the shoot and rehearse technique and composition for each shot in your mind. Prepare the location, props and clothes ahead of time and for a truly effective shoot be sure to communicate your agenda, objective and posing directions coherently and calmly.

2.Fashion photography is all about clothes and beauty, so pull all the elements of the scene and the model together to reflect this. For example if the shoot focuses on the clothes– use make-up and hair styling to compliment the garment – and vice versa. If you desire a provocative or seductive look opt for dark, heavy make-up and over styled hair; alternatively for an innocent or natural feel choose subdued pastel tones, gentle make up and soft flowing hair styles. Unusual looking folk bring interest and personality to the piece, whereas female models with large almond eyes, big lips, small chins and symmetrical faces are deemed “more commercial”.

3.Posing can be a tricky point to master but browse through the latest men’s and women’s magazines to target a few inspired suggestions as well as getting a grip on what is currently fashionable. Using ‘broken down’ poses or poses that require angular body shapes can add interest and edginess to the piece – as well as help to elongate body length.

4.A studio is an ideal place to perform a fashion shoot because photographers can easily control lighting and stabilise conditions. If you are shooting in a studio environment remember to meter all areas of the scene to avoid unwanted shadows and the use of a separate light meter rather than the one in your camera, will offer a more accurate reading.

5.If you can’t afford to hire a professional studio and all the pricey equipment there is a way you can cheat at home. Clear a space in a room that benefits from large windows and peg a white sheet, net or fabric across the window. On a bright sunny day you’ll have yourself a homemade soft box – ideal for flattering even light.

6.When shooting in low light or into the sun, you may require an extra light source. If all you have is flash then rather than shoot straight on, set it to bounce of a nearby reflector, wall or ceiling. Experiment with angles to create an array of effects and discover what works best for you and the scene you are shooting. Be careful to pay attention to unwanted shadows that may fall across the face and body.

7.Props are fantastic for telling a narrative within a fashion shot, but one of the best props to use is a mirror. A mirror can be a used to tell a story and act as an effective tool that allows the photographer to display the front and back of your model. Take a spate reading for the mirror and you may need to bracket your exposures here. Be careful to position yourself, lighting equipment and anything not to do with the shoot out of the reflection.
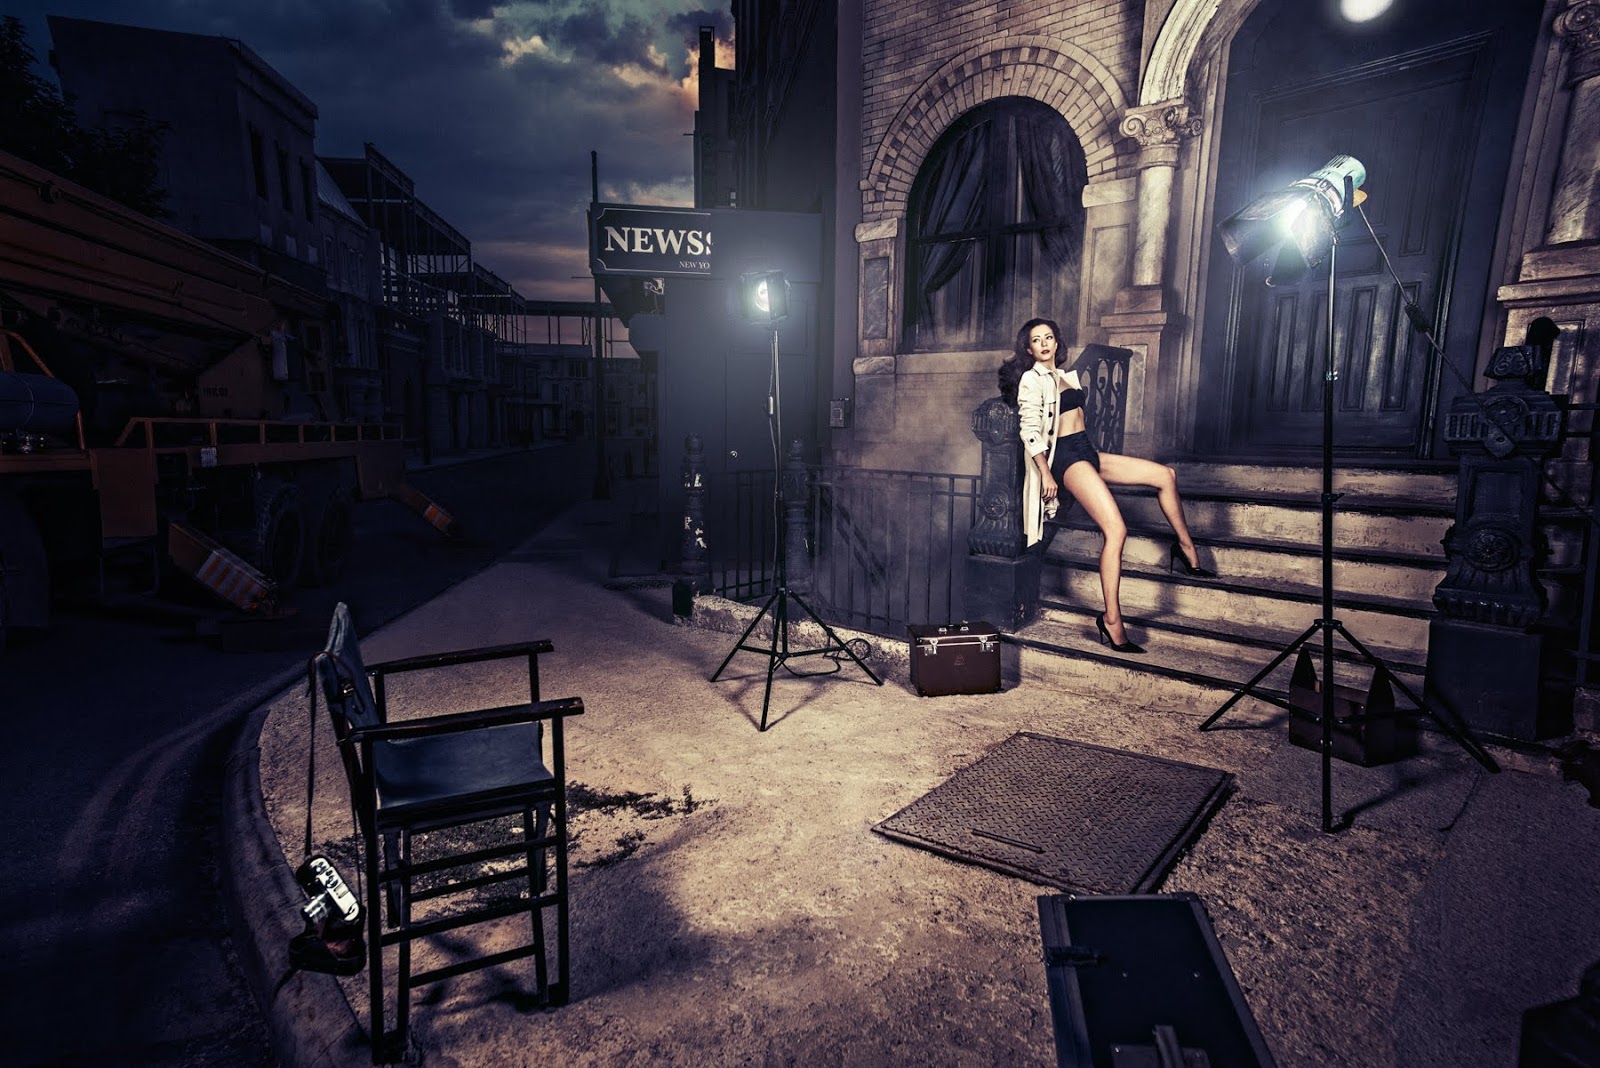
8.Location, location, location! Getting the right location is important if you want to convey a narrative within your shot. For example if the clothing and beauty styling are edgy, hard or provocative you may want to consider an urban setting , alternatively for spring/summer and natural fashions find a rural environment like; a field, meadow, beach, woodland or river bank.

9.Influence the image by moving around the scene and exploring which angles work best to full expose the garment. This could mean climbing a ladder, crouching low, working a slanted angle or moving closer to the subject. Think about what the message is here and create a composition to reinforce it.

10.Fashion photography is achievable alone, but to step it up a gear rope in a friend, family member or photography student as an assistant. Often photographers need an extra pair of hands to position reflectors, angle and reset lighting equipment, tweak the positioning of garments and clear the scene.

Technology of photography,
equipment, techniques, and processes used in the production of photographs.
 The most widely used photographic process is the black-and-white negative–positive system (Figure 1). In the camera the lens projects an image of the scene being photographed onto a film coated with light-sensitive silver
salts, such as silver bromide. A shutter built into the lens admits
light reflected from the scene for a given time to produce an invisible
but developable image in the sensitized layer, thus exposing the film.
The most widely used photographic process is the black-and-white negative–positive system (Figure 1). In the camera the lens projects an image of the scene being photographed onto a film coated with light-sensitive silver
salts, such as silver bromide. A shutter built into the lens admits
light reflected from the scene for a given time to produce an invisible
but developable image in the sensitized layer, thus exposing the film.
During development (in a darkroom) the silver salt crystals that have been struck by the light are converted into metallic silver, forming a visible deposit or density. The more light that reaches a given area of the film, the more silver salt is rendered developable and the denser the silver deposit that is formed there. An image of various brightness levels thus yields a picture in which these brightnesses are tonally reversed—a negative. Bright subject details record as dark or dense areas in the developed film; dark parts of the subject record as areas of low density; i.e., they have little silver. After development the film is treated with a fixing bath that dissolves away all undeveloped silver salt and so prevents subsequent darkening of such unexposed areas. Finally, a wash removes all soluble salts from the film emulsion, leaving a permanent negative silver image within the gelatin layer.
A positive picture is obtained by repeating this process. The usual procedure is enlargement: the negative is projected onto a sensitive paper carrying a silver halide emulsion similar to that used for the film. Exposure by the enlarger light source again yields a latent image of the negative. After a development and processing sequence the paper then bears a positive silver image. In contact printing the negative film and the paper are placed face to face in intimate contact and exposed by diffused light shining through the negative. The dense (black) portions of the negative image result in little exposure of the paper and, so, yield light image areas; thin portions of the negative let through more light and yield dark areas in the print, thus re-creating the light values of the original scene.
Cameras and lenses
The lens projects an inverted image of the scene in front of the camera onto the film in the image plane. The image is sharp only if the film is located at a specific distance behind the lens. This distance depends on the focal length of the lens (see below Characteristics and parameters of lenses) and the distance of the object in front of the lens. To photograph near and far subjects, all but the simplest cameras have a focusing adjustment that alters the distance between the lens and the film plane to make objects at the selected distance produce a sharp image on the film. In some cameras focusing adjustment is achieved by moving only the front element or internal elements of the lens, in effect modifying the focal length.
The shutter consists of a set of metallic leaves mounted in or behind the lens or a system of blinds positioned in front of the film. It can be made to open for a predetermined time to expose the film to the image formed by the lens. The time of this exposure is one of the two factors controlling the amount of light reaching the film. The other factor is the lens diaphragm, or aperture, an opening with an adjustable diameter. The combination of the diaphragm opening and exposure time is the photographic exposure. To obtain a film image that faithfully records all the tone gradation of the object, this exposure must be matched to the brightness (luminance) of the subject and to the sensitivity or speed of the film. Light meters built into most modern cameras measure the subject luminance and set the shutter or the lens diaphragm to yield a correctly exposed image.


A 35-mm camera usually has a direct-vision viewfinder, often combined with a rangefinder or autofocus system for accurate distance settings. Most current versions incorporate a light meter coupled with the exposure settings on the camera. Advanced models may have interchangeable lenses and an extended accessory system. Many 35-mm cameras are single-lens reflex types (see below).
1.Fashion photography should convey an essence of authority, so your direction of the model(s) needs to be confident and self-assured. Showing signs of anxiety, stress or lack of direction will invariably be reflected in the performance of your model so make the subject feel comfortable and involved. Organise a shot list before the shoot and rehearse technique and composition for each shot in your mind. Prepare the location, props and clothes ahead of time and for a truly effective shoot be sure to communicate your agenda, objective and posing directions coherently and calmly.

direction of the model(s) needs to be confident and self-assured.
2.Fashion photography is all about clothes and beauty, so pull all the elements of the scene and the model together to reflect this. For example if the shoot focuses on the clothes– use make-up and hair styling to compliment the garment – and vice versa. If you desire a provocative or seductive look opt for dark, heavy make-up and over styled hair; alternatively for an innocent or natural feel choose subdued pastel tones, gentle make up and soft flowing hair styles. Unusual looking folk bring interest and personality to the piece, whereas female models with large almond eyes, big lips, small chins and symmetrical faces are deemed “more commercial”.

Fashion photography is all about clothes and beauty

Posing can be a tricky point to master

A studio is an ideal place to perform a fashion shoot
6.When shooting in low light or into the sun, you may require an extra light source. If all you have is flash then rather than shoot straight on, set it to bounce of a nearby reflector, wall or ceiling. Experiment with angles to create an array of effects and discover what works best for you and the scene you are shooting. Be careful to pay attention to unwanted shadows that may fall across the face and body.

When shooting in low light or into the sun
8.Location, location, location! Getting the right location is important if you want to convey a narrative within your shot. For example if the clothing and beauty styling are edgy, hard or provocative you may want to consider an urban setting , alternatively for spring/summer and natural fashions find a rural environment like; a field, meadow, beach, woodland or river bank.

the right location

Influence the image by moving around the scene

Content Courtesy of Nairobi fashion Hub
Technology of photography,
equipment, techniques, and processes used in the production of photographs.

During development (in a darkroom) the silver salt crystals that have been struck by the light are converted into metallic silver, forming a visible deposit or density. The more light that reaches a given area of the film, the more silver salt is rendered developable and the denser the silver deposit that is formed there. An image of various brightness levels thus yields a picture in which these brightnesses are tonally reversed—a negative. Bright subject details record as dark or dense areas in the developed film; dark parts of the subject record as areas of low density; i.e., they have little silver. After development the film is treated with a fixing bath that dissolves away all undeveloped silver salt and so prevents subsequent darkening of such unexposed areas. Finally, a wash removes all soluble salts from the film emulsion, leaving a permanent negative silver image within the gelatin layer.
A positive picture is obtained by repeating this process. The usual procedure is enlargement: the negative is projected onto a sensitive paper carrying a silver halide emulsion similar to that used for the film. Exposure by the enlarger light source again yields a latent image of the negative. After a development and processing sequence the paper then bears a positive silver image. In contact printing the negative film and the paper are placed face to face in intimate contact and exposed by diffused light shining through the negative. The dense (black) portions of the negative image result in little exposure of the paper and, so, yield light image areas; thin portions of the negative let through more light and yield dark areas in the print, thus re-creating the light values of the original scene.
Cameras and lenses


Basic camera functions
In its simplest form, the camera is a light-tight container carrying a lens, a shutter, a diaphragm, a device for holding (and changing) the film in the correct image plane, and a viewfinder to allow the camera to be aimed at the desired scene.The lens projects an inverted image of the scene in front of the camera onto the film in the image plane. The image is sharp only if the film is located at a specific distance behind the lens. This distance depends on the focal length of the lens (see below Characteristics and parameters of lenses) and the distance of the object in front of the lens. To photograph near and far subjects, all but the simplest cameras have a focusing adjustment that alters the distance between the lens and the film plane to make objects at the selected distance produce a sharp image on the film. In some cameras focusing adjustment is achieved by moving only the front element or internal elements of the lens, in effect modifying the focal length.
The shutter consists of a set of metallic leaves mounted in or behind the lens or a system of blinds positioned in front of the film. It can be made to open for a predetermined time to expose the film to the image formed by the lens. The time of this exposure is one of the two factors controlling the amount of light reaching the film. The other factor is the lens diaphragm, or aperture, an opening with an adjustable diameter. The combination of the diaphragm opening and exposure time is the photographic exposure. To obtain a film image that faithfully records all the tone gradation of the object, this exposure must be matched to the brightness (luminance) of the subject and to the sensitivity or speed of the film. Light meters built into most modern cameras measure the subject luminance and set the shutter or the lens diaphragm to yield a correctly exposed image.

Principal camera types
The simplest camera type, much used by casual amateurs, has most of the features listed in the previous section—lens, shutter, viewfinder, and film-holding system. The light-tight container traditionally had a box shape. Present-day equivalents are pocket cameras taking easy-load film cartridges or film disks. Typically, a fixed shutter setting gives about 1/50-second exposure; the lens is permanently set to record sharply all objects more than about five feet (1.5 metres) from the camera. Provision for a flash may be built in. Though simple to handle, such cameras are in daylight restricted to pictures of stationary or slow-moving subjects.

The 35-mm miniature camera
Perforated 35-millimetre (mm) film (originally standard motion-picture film) in cartridges holding 12 to 36 exposures with a nominal picture format of 24 × 36 mm is employed in miniature cameras. Smaller image formats down to 18 × 24 mm (half frame) may be used. The 35-mm camera has a lens with a range of apertures and a shutter with exposure times typically from one second to 1/1,000 second or shorter, and it can focus on subject distances from infinity down to five feet or less. A winding lever or built-in motor advances the film from one frame to the next and at the same time tensions (cocks) the shutter for each exposure. At the end of the film load the film is rewound into the cartridge for removal from the camera in daylight.A 35-mm camera usually has a direct-vision viewfinder, often combined with a rangefinder or autofocus system for accurate distance settings. Most current versions incorporate a light meter coupled with the exposure settings on the camera. Advanced models may have interchangeable lenses and an extended accessory system. Many 35-mm cameras are single-lens reflex types (see below).
No comments:
Post a Comment